

High Jump Technique for Beginners: The 4-Phase Foundation Protocol
Most beginners make the same mistake: they focus on the bar. The bar is the last thing that matters.
Before you ever attempt to clear a height, you need four things working in order — a consistent approach, a loaded takeoff, a controlled arch over the bar, and a safe landing. Get those four phases right at low heights and the bar takes care of itself.
Quick Answer: High jump technique for beginners follows four phases in sequence: (1) the J-curve approach, which builds speed and sets up body position; (2) the penultimate step and takeoff, which converts that speed into height; (3) the Fosbury Flop arch over the bar; and (4) the landing. Each phase must be learned separately before combining them at full speed.
This guide walks you through all four phases with specific cues for each one — the same progression I use with athletes who have never jumped before. If you follow it in order and resist the urge to raise the bar too soon, you'll build a technique foundation that holds up under competition pressure. If you're still learning the rules, equipment, and scoring of the event, start with the Beginner's Guide to High Jump first, then come back here for technique.
Start Here: Why Beginners Should Learn the Scissors Kick First
Before you learn the Fosbury Flop, learn the scissors kick. Every beginner should.
The scissors kick is an upright clearance style where you run at the bar at a shallow angle, kick your lead leg over, and follow with the trail leg — like a giant step over the bar. You land on your feet on the other side.
It looks nothing like elite high jump. That's fine. It does three things that matter:
It removes the fear of the landing mat. The Fosbury Flop requires you to jump backwards and land on your shoulders. That's disorienting until you've spent time on the mat. The scissors kick lets you get comfortable with the pit — running at it, trusting it — without adding the complexity of the Flop. Most athletes who bail out mid-jump do so because they don't trust the landing surface yet. Fix that first.
It teaches the takeoff position. The scissors kick uses the same plant foot, the same knee drive, and the same upward push at takeoff as the Fosbury Flop. The only difference is what your body does in the air. If your scissors kick takeoff is flat and forward, your Flop takeoff will be too.
It gives you early success. A new athlete who clears a bar — even with scissors technique at 3 feet — has something to build on. An athlete who attempts the Flop on day one and keeps knocking the bar down has nothing.
Spend your first two or three sessions on scissors kick only. Set the bar at knee to hip height. Focus on hitting the same takeoff spot every time and driving the lead knee upward, not forward. When that feels automatic, you're ready for Phase 1 of the full technique.
- Scissors kick builds mat confidence before adding the complexity of the backwards Flop landing
- Takeoff mechanics are identical — plant foot, knee drive, upward push — only the flight differs
- Early success at low heights with scissors technique creates the neural foundation for Flop development
- Two to three sessions on scissors before attempting the Fosbury Flop is the right sequence, not a shortcut
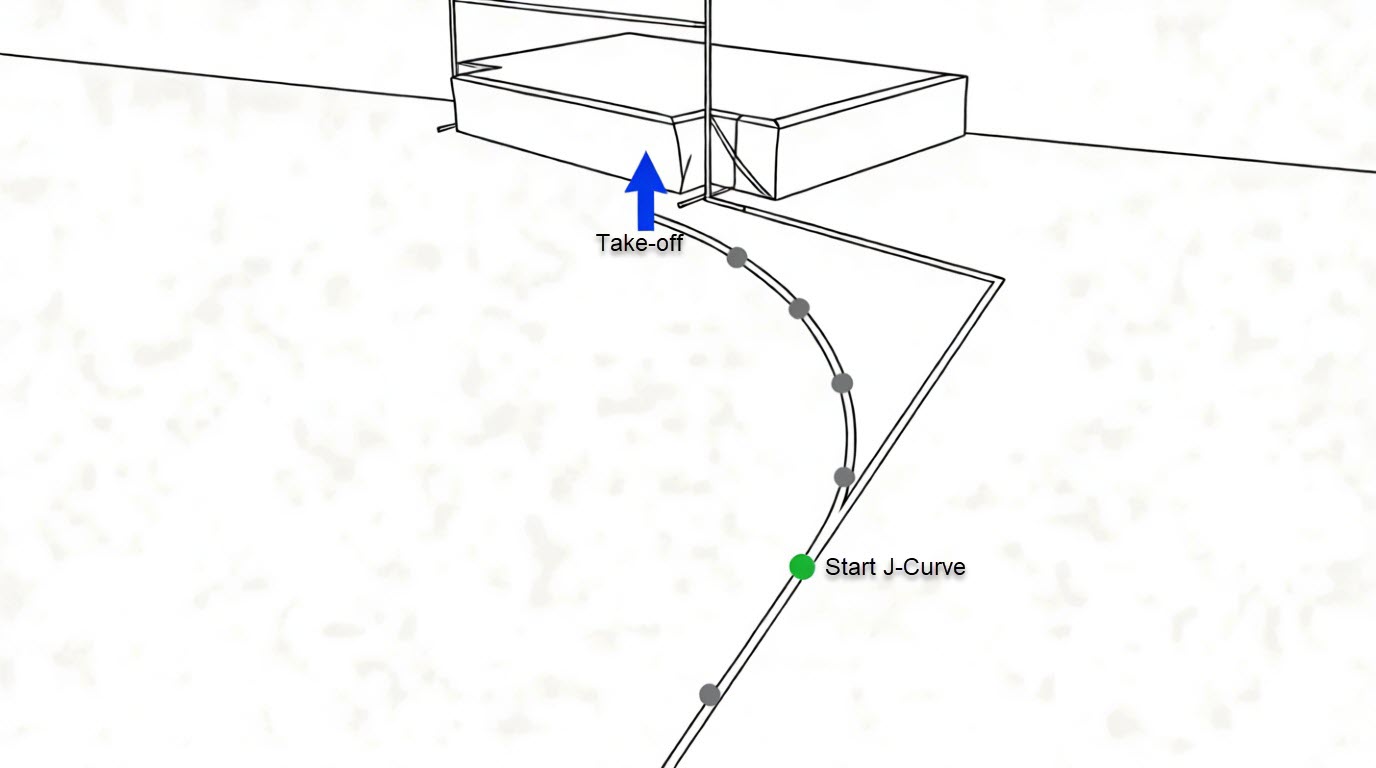
Phase 1: The J-Curve Approach — Building Speed in the Right Direction
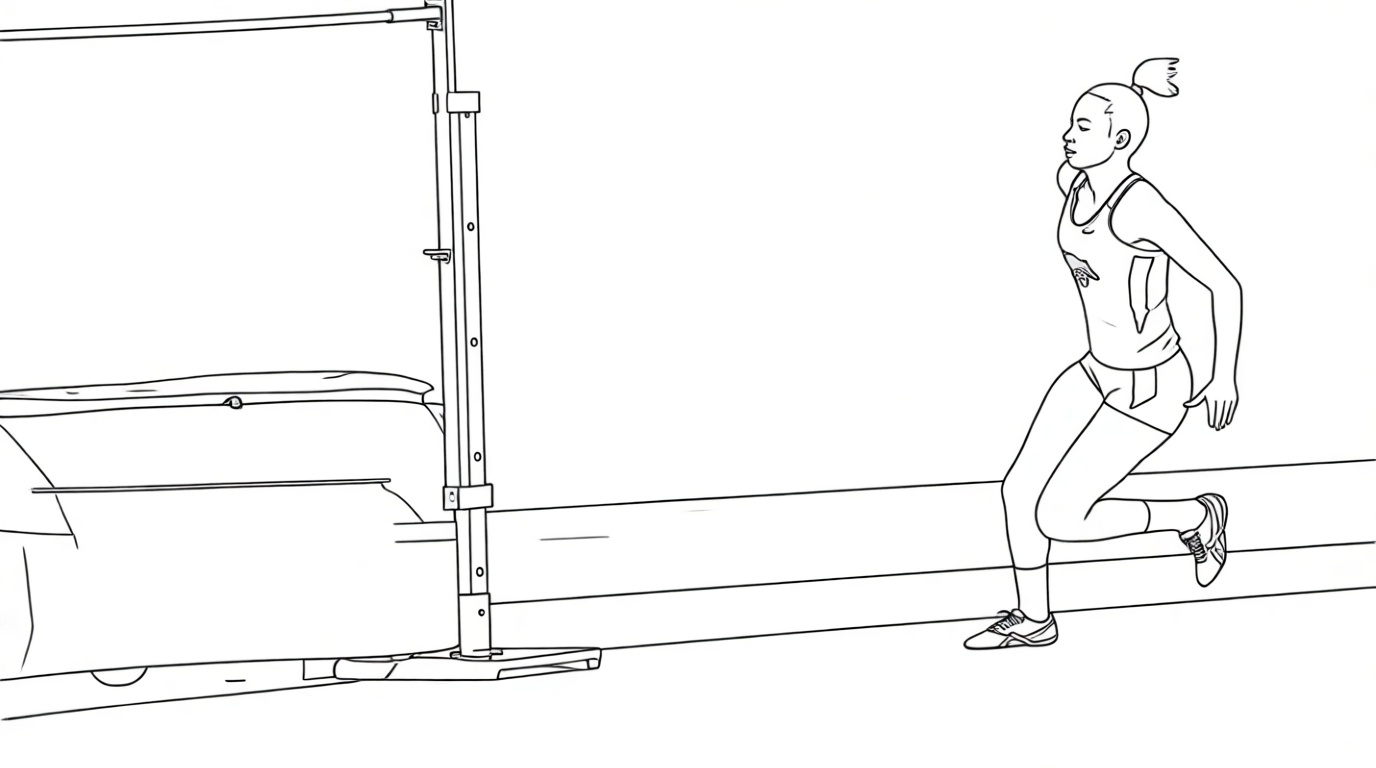
The approach run is the most underrated part of high jump technique. Most beginners treat it like a warm-up sprint. It isn't. The approach is where you build everything the jump needs.
The shape is a J — a straight section that builds speed, followed by a curved arc that tilts your body toward the bar. That tilt is not something you create at takeoff. The curve creates it automatically when you run it correctly. This is why the approach shape matters: if you run a straight line at the bar, you arrive upright with no rotation loaded. If you run the J, you arrive leaning slightly inward with your body already beginning to turn toward the pit.
The approach structure for beginners:
Start with a 6-step approach. Most experienced jumpers use 10 steps, but 6 is enough to learn the pattern without adding variables.
Steps 1–3 (the straight section): Accelerate. Your goal is controlled speed — not a sprint, not a jog. Think of the first step as the start of a build. Each step should feel slightly faster than the last.
Steps 4–6 (the curve): Your body leans inward away from the bar. This is not a conscious lean — it happens because you're running a curved path. If you feel like you're tilting, that's correct. Your hips stay high. Your steps shorten slightly. Your foot contacts are flat and quick, not bounding or bouncy.
The last step — Step 6 — is your penultimate step. It's longer than the others. That extra length lowers your hips slightly and loads them for the jump. This is the most important step in the entire approach. We cover it in detail in Phase 2. For a deeper breakdown of the full 10-step approach used by competitive jumpers, see the guide to mastering the high jump approach run.
Your starting mark:
Stand at the bar with your back to it, at the takeoff point. Walk or jog your 6-step approach in reverse — step backward away from the bar following your approach path. The spot where your first step lands is your starting mark. Put a piece of tape there. Use it every time.
Your starting mark will shift as you get stronger and faster. Recheck it every few sessions. Athletes who eyeball it jump from a different spot every time and never develop consistent takeoff mechanics.
- The J-curve tilts your body toward the pit automatically — the curve does the work, you don't force the lean
- Start with a 6-step approach before moving to 8 or 10 steps — fewer variables while learning the shape
- Steps 1–3 build speed; Steps 4–6 establish the arc and body lean into takeoff
- Your starting mark must be fixed with tape — athletes who eyeball it produce inconsistent takeoff mechanics
Phase 2: The Penultimate Step and Takeoff — Loading and Launching
The takeoff is where the height is made. Every centimeter you clear comes from what happens in the 0.2 seconds your foot is on the ground at takeoff. Get this phase right and the rest of the jump becomes manageable. Get it wrong and nothing you do in the air will fix it.
The penultimate step (second-to-last step):
Your penultimate step — the second-to-last before you jump — should be your longest step of the approach. Not a giant bound, but noticeably longer than your normal stride. This longer step drops your hips slightly and shifts your center of mass behind your takeoff foot. That position loads the jump the same way bending your knees loads a squat. Without it, you jump flat.
The cue: Long step, short step — go up. The penultimate is long. The final step (the plant) is short. Then you go up. If both steps feel the same length, you're not loading correctly.
The plant foot:
Your takeoff foot lands slightly ahead of your body — not directly under your hips, and not far out in front. Think shin angle: if your shin is perfectly vertical at ground contact, you're too far under. If it's leaning far forward, you're reaching. The right position feels like you're about to sit back onto a stool slightly behind you.
Your foot lands heel-to-toe (or flat), not on the ball of the foot. Landing on the ball kills the elastic energy stored by the penultimate step. You want the whole foot to contact the ground so the leg can act like a spring. For a complete breakdown of takeoff mechanics beyond these beginner fundamentals, see the full guide to high jump takeoff technique.
The takeoff sequence:
Once your foot plants, three things happen almost simultaneously:
1. Your plant leg extends — ankle, knee, hip in sequence
2. Your lead knee drives straight up to hip height (not forward, not sideways — straight up)
3. Both arms swing upward together, wrists reaching your shoulder height
The arm drive is where most beginners lose height. One arm up, one arm back cuts your lift in half. Both arms go up. Every time.
Stay tall through the whole sequence. If you feel yourself leaning toward the bar at takeoff, you're trying to rotate early — don't. The rotation happens after you leave the ground, not during the push.
- Long penultimate step drops the hips and loads the jump — without it, the takeoff is flat
- Plant foot lands heel-to-toe slightly ahead of center of mass, not directly underneath
- Takeoff sequence: ankle → knee → hip extension, lead knee straight up to hip height
- Both arms drive upward together — one arm up, one arm back cuts vertical lift in half
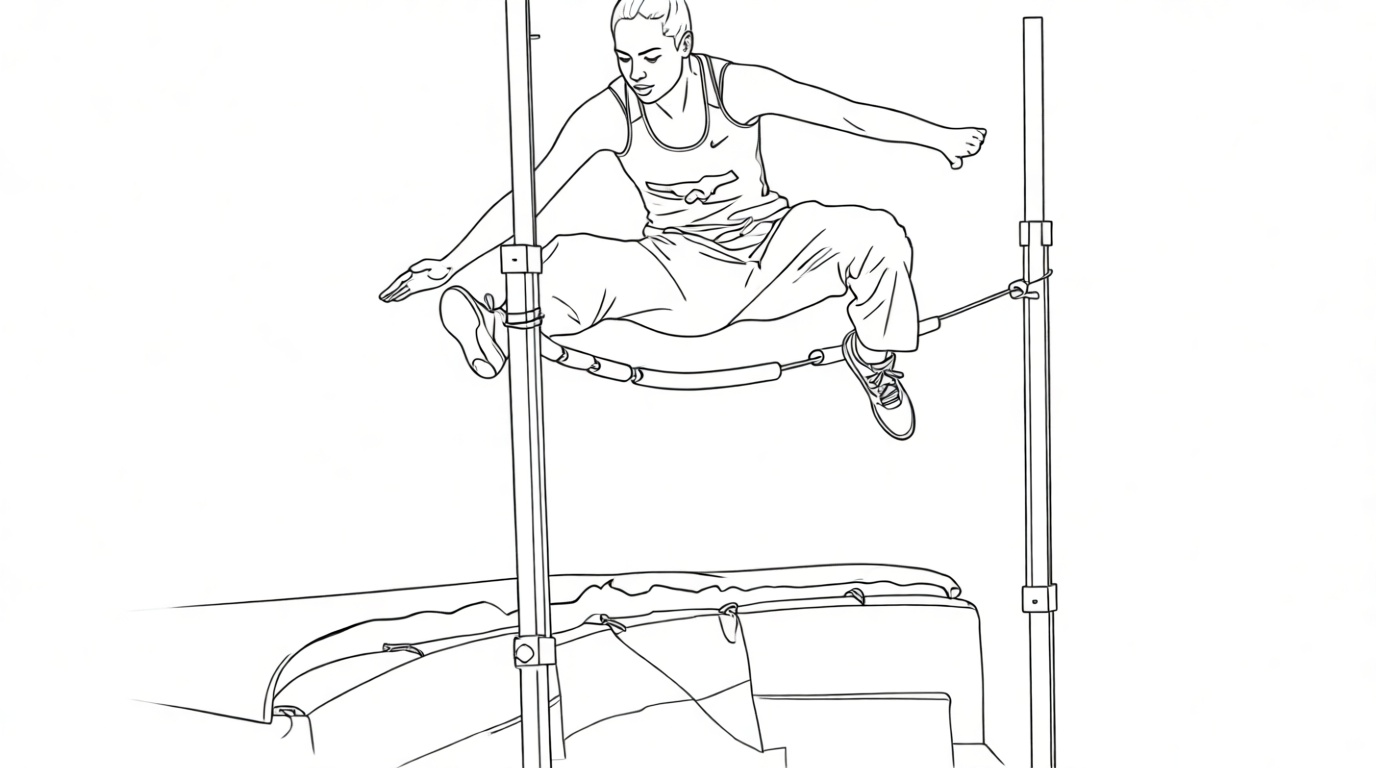
Phase 3: The Fosbury Flop — Arch, Sequence, and Bar Clearance
The Fosbury Flop looks complicated from the outside. The body arches backward, the hips rise, the legs snap up last. Watching it in slow motion, it seems like something you'd need years to learn.
You don't. The mechanics are learnable in a single session if you approach them in the right order.
The core principle:
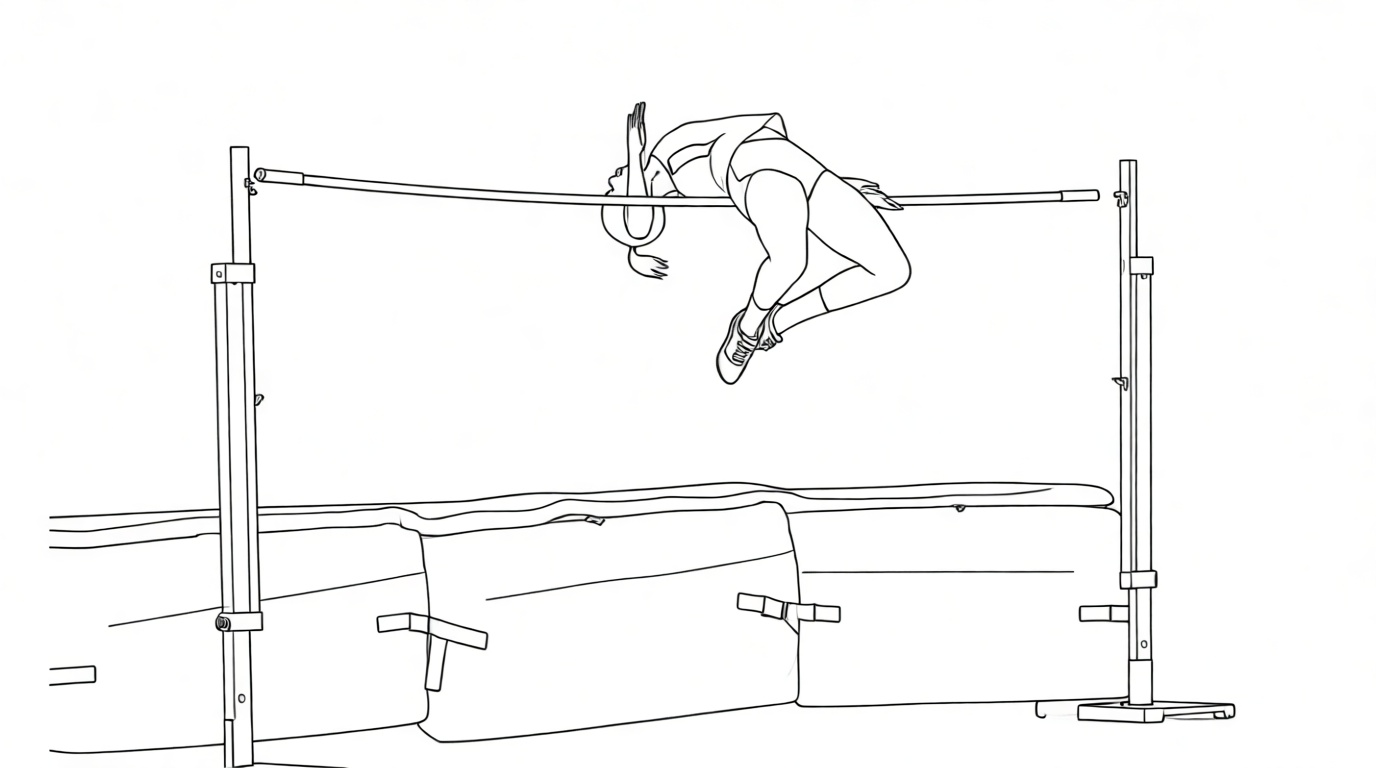
Your body crosses the bar one part at a time — head and shoulders first, then hips, then legs. This is called the wave sequence. Beginners who try to clear the bar all at once hit it with their hips or heels because no single body position can clear every part simultaneously.
The other key principle: the arch pushes your center of mass — the physical point where your body weight averages out, roughly at your navel — below the bar while your body passes over it. A deep arch means the bar can be higher than your center of mass actually travels. This is the biomechanical trick that makes the Fosbury Flop more efficient than any other clearance technique.
The clearance sequence:
Step 1 — Head back. As your hips reach bar height, drop your head back toward the mat and let your eyes find the landing surface. The cue: Find the mat. This initiates the rotation. Don't force it — just look for the mat.
Step 2 — Drive the stomach up. Once your shoulders have crossed the bar, actively push your stomach toward the sky. This is the arch. It's not passive — you need to contract the muscles of your lower back to hold the position. The cue: Drive the stomach.
Step 3 — Legs last. Your legs stay relaxed through Steps 1 and 2. Only after your hips have cleared the bar do you snap your knees straight and lift your feet. The cue: Legs last. If your legs move early, they push your hips down into the bar.
For a deeper dive into the physics of the arch and a diagnostic table for every type of bar contact, see the full guide to high jump bar clearance technique.
For beginners, start the Flop from standing.
Stand with your back to the bar, bar set at hip height. Drop backward over it: head back, stomach up, legs snap up. Do this 10 times from standing before adding an approach. You're teaching your nervous system the sequence without the distraction of speed and approach mechanics. Once standing clearance feels natural, add a 3-step approach. Then a 6-step. Then full approach.
- Wave sequence: head and shoulders first, hips second, legs last — never all at once
- The arch lowers your center of mass below the bar — efficiency through physics, not just flexibility
- Three cues in order: 'Find the mat' → 'Drive the stomach' → 'Legs last'
- Learn the clearance sequence from standing before adding approach speed — this is not optional
Phase 4: The Landing — What Safe and Correct Looks Like
The landing is the phase nobody teaches explicitly — and it's why some beginners develop a fear of the Flop that limits their development for months.
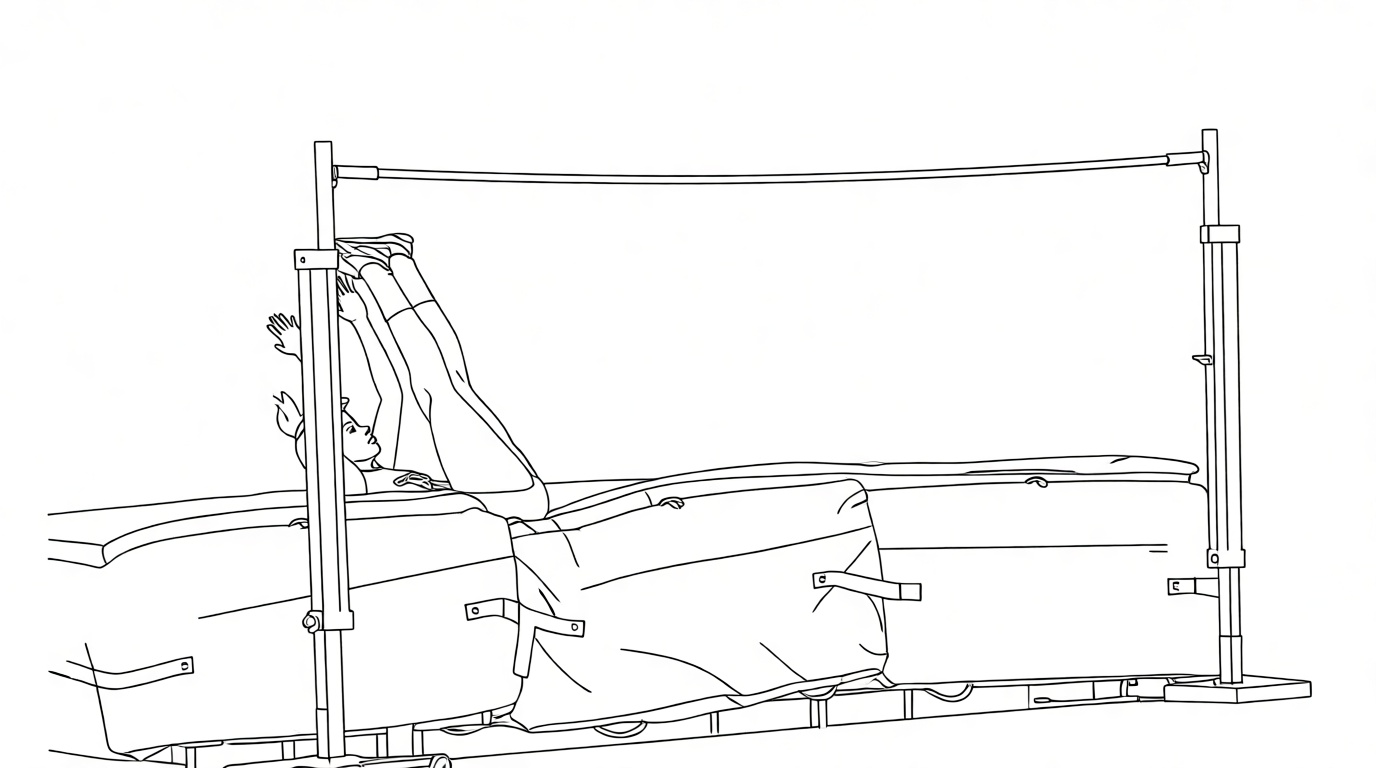
A correct Fosbury Flop landing happens on your upper back and shoulders, in the center of the mat. Not on your neck, not on your lower back, not on your side. Upper back, center of mat.
When you land correctly, it should feel like a controlled collapse — you land on your upper back and your body curls forward naturally as the mat absorbs the impact. It's not painful. If it hurts, your landing position is wrong.
The three landing errors beginners make:
Landing on the neck. This means your head stayed up instead of dropping back during the arch. The fix: consciously look for the mat earlier in the flight — before your hips clear the bar, not after.
Landing sideways. This means your approach angle is off and you're rotating the wrong direction in flight. Check that your approach curve comes from the correct side (left-footed jumpers approach from the right; right-footed jumpers approach from the left). If the angle is right and you're still landing sideways, your head is turning to one side during the arch. Keep your chin pointed straight up at the ceiling.
Landing in the corner of the pit. Your approach starting mark needs to move inward, toward the center of the bar. You're arriving at the wrong part of the bar for your current starting position.
Building confidence with the landing:
If the landing is making you hesitate — if you're pulling out of jumps mid-approach because you don't trust it — do this drill: stand beside the pit (not over the bar) and fall backward onto the mat from standing height. Repeat until the landing is familiar. Trust in the landing surface comes from repetition, not courage.
- Correct landing is on upper back and shoulders, center of mat — not neck, lower back, or side
- Neck landing = head didn't drop back; fix by looking for the mat earlier in the arc
- Sideways landing = approach angle or chin rotation issue; chin should point straight up during arch
- Corner landing = starting mark needs to move inward toward bar center
Putting It Together: Your First 4-Session Progression
Here's how to sequence the four phases across your first four sessions. Each session builds on the last. Do not skip ahead.
Session 1 — Mat and Scissors
Spend the entire session on the mat and scissors kick. No Flop attempts.
- 10 minutes: fall backward onto the mat from standing (no bar)
- 20 minutes: scissors kick over a bar at knee height, 6-step approach
- Focus: consistent step count, takeoff spot, lead knee driving up
Session 2 — Standing Flop + Approach Shape
- 10 minutes: standing Flop clearance from back to bar, bar at hip height
- 20 minutes: approach run only (no jumping) — J-curve shape, 6 steps, tape your starting mark
- 10 minutes: 3-step Flop clearance
- Focus: wave sequence (head → stomach → legs), starting mark consistency
Session 3 — 6-Step Flop
- 10 minutes: standing Flop clearance (warm-up for the sequence)
- 30 minutes: full 6-step approach with Flop, bar at a height you clear easily
- Focus: penultimate step loading, arm drive at takeoff, wave sequence in flight
- Do not raise the bar until the technique is consistent — 8 out of 10 jumps should look the same
Session 4 — Add Height
- Begin with 10 standing clearances
- Full 6-step approach at your current comfortable height for 5–6 jumps
- Raise the bar 2 inches. Jump 3 times. Identify what breaks down.
- That breakdown is your technical priority for the next training block.
One rule for all four sessions: If you miss three jumps in a row, lower the bar 2 inches before continuing. Repeated misses at a given height don't teach technique — they teach hesitation.
- Session 1: mat trust and scissors only — no Flop attempts
- Session 2: standing Flop sequence + approach shape without jumping
- Session 3: full 6-step Flop at comfortable height, technique consistency before height
- Session 4: first height increment — 2 inches, 3 jumps, identify what breaks down
Frequently Asked Questions
How do you do the high jump step by step?
High jump technique follows four phases in order: the J-curve approach run (6–10 steps, curved path building speed), the penultimate step and takeoff (long second-to-last step, plant foot, lead knee drives up, both arms swing upward), the Fosbury Flop bar clearance (head back, arch the spine, legs snap up last), and the landing (upper back and shoulders, center of the mat). Each phase should be learned separately at low bar heights before combining them at full speed.
What technique is used in high jump?
Almost all competitive high jumpers use the Fosbury Flop — a technique where the athlete runs a J-shaped approach, takes off on one foot, and crosses the bar backwards with an arched back. The body crosses in sequence: head and shoulders first, then the spine arches to push the hips over, then the legs snap up last. Beginners typically learn the simpler scissors kick first, which uses the same takeoff mechanics but an upright clearance position.
What foot do you take off on in high jump?
In high jump you take off on one foot only — two-foot takeoffs are a foul. Your takeoff foot is typically your stronger leg. To determine it: try a short approach from both sides and notice which feels more natural. Most right-handed athletes take off from the left foot and approach from the right side. Most left-handed athletes take off from the right foot and approach from the left. There are exceptions — testing both is worth the time before ingraining an approach pattern.
Why do high jumpers go over the bar backwards?
Going over backwards — the Fosbury Flop — allows the athlete's center of mass to pass below the bar while their body arches over it. Because the spine curves, the average position of the body's weight drops below the bar even as the body surface passes above it. This means a jumper can clear a bar that's higher than their center of mass ever actually travels. Older techniques like the straddle required the center of mass to go higher than the bar, making them mechanically less efficient.
How do beginners learn the Fosbury Flop?
Start from standing, not from a full approach. Stand with your back to the bar set at hip height, then drop backward — head back first, arch the spine, legs snap up last. Do this 10 times before attempting any approach jumps. This teaches the three-phase wave sequence (head, arch, legs) without the distraction of approach mechanics. Once the standing clearance is comfortable, add a 3-step approach, then a 6-step, then full approach speed.
How high should beginners set the bar?
Set it lower than you think. For scissors kick practice, knee height. For first Fosbury Flop attempts from standing, hip height. For first full-approach Flop jumps, a height you're certain you can clear — the goal is technique repetition, not height. Raise the bar only after you can clear a given height cleanly 8 out of 10 attempts. Beginners who raise the bar too soon practice failure instead of technique.
Conclusion
High jump technique isn't complicated — but it is sequential. You can't fix the arch if the takeoff is wrong. You can't fix the takeoff if the approach is inconsistent. Work from the ground up, in the order the phases actually occur.
Start with scissors. Build the approach shape. Load the penultimate step. Learn the wave sequence from standing before you add speed. Trust the mat.
Most beginners who plateau early do so because they raised the bar before the foundation was solid. The athletes who improve quickly are the ones who stayed at low heights until the technique was automatic — then added height on top of a pattern that already worked.
If you want a structured tool to track your clearance mechanics session by session, the Bar Clearance Checklist breaks down the key positions in the clearance phase with a self-assessment format you can bring to practice.
Track Your Bar Clearance Progress
The Bar Clearance Checklist maps Phase 3 mechanics to a session-by-session self-assessment. Free download — bring it to your next practice.